Building a GraphQL API with TypeScript + Node.js [Full-stack Tutorial Part 1]
ProfilePicture of Pedro Manfroi
Pedro Manfroi
Senior Full-stack Developer
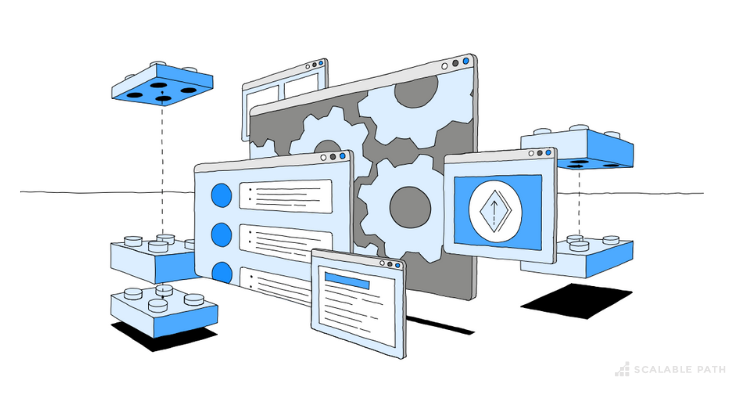
Components of full-stack app development architecture

In this article series, we’re going to build a full-stack demo app to explore some of the advantages of building a GraphQL API in a Node.js back-end using TypeScript. We’ll also learn how to integrate it with a client that uses React front-end to show the flexibility and scalability of this architecture.

Table Of Contents

Key Benefits of Using this Full-stack Architecture

This architecture will help us to:

What this Full-stack Project Will Cover

In this tutorial series, we’ll cover the following parts: 

Part I: In part one of this series, we’ll look at an overview of the demo project that we’re going to build, set up the local environment, model our data and start testing it.

Part II: In part two, we’ll dive deep into some of the core aspects of GraphQL and implement/test the back-end features of our project.

Part III: In part three, we’ll wire up the front-end client and integrate it with our back-end.

Full-stack Development Tools We’ll Use

Here are the tools that we are going to use:

Project Overview: Building a Full-stack App

For this demo project, we’re going to build the foundation of a simple Product Catalog & Inventory Management application, covering both the Back-end and the Front-end work. 

Here’s how the project will be structured:

Back-end: We’ll build our back-end with Node.js and use TypeScript for type safety. Our API will be powered with Express and a PostGraphile, and we’ll use TypeORM as our ORM tool to make it easier to interact with a PostgreSQL database.

Front-end: We’ll use React to build our front-end, and the Apollo GraphQL client to communicate with the back-end. We’ll also use GraphQL Codegen to generate types from the GraphQL schema.

Full-stack Project Features

Here’s an overview of the features we want to include in our app:

Project Goal

Our goal is to build the foundation of a robust and modern full-stack architecture that leverages GraphQL to facilitate client and server communications and uses TypeScript for type safety and maintainability.

Without further ado, let’s get started!

Project Setup

Let’s start by installing the initial dependencies in our project. For the sake of simplicity, we’ll assume that you can either install these dependencies or already have them installed.

Bootstrapping Our Code

First, create a folder in the project’s root directory. Then, let’s initialize the project with the following command:

1npm init -y
2

Next, let’s install TypeScript:

1npm install --save-dev typescript@^4.7.4
2

Let’s also create a TypeScript configuration file by creating a new file called tsconfig.json in the root directory and updating it with the following content:

1{
2 "compilerOptions": {
3 "target": "es2018",
4 "lib": ["es2018"],
5 "emitDecoratorMetadata": true,
6 "experimentalDecorators": true,
7 "module": "commonjs",
8 "rootDir": "src",
9 "resolveJsonModule": true,
10 "allowJs": true,
11 "outDir": "build",
12 "esModuleInterop": true,
13 "forceConsistentCasingInFileNames": true,
14 "strict": true,
15 "strictPropertyInitialization": false,
16 "noImplicitAny": true,
17 "skipLibCheck": true
18 }
19 }
20

To check if TypeScript is working as expected, we’ll create a /src directory in the root folder of the project and add a new file called hello.ts, containing a simple console.log statement:

1console.log('Hello world!')
2

Now, you should have a file structure that looks like this:

Screenshot of full-stack demo app project structure

Let’s try executing this file by running the following command from the root folder:

1node src/hello.ts
2

You should see a ‘Hello World!’ message from the terminal. You can delete the hello.ts file after.

Installing the Remaining Back-End Dependencies

In the root folder, let’s run these statements to install the dependencies for our back-end:

1npm install express@^4.18.1 typeorm@^0.3.6 reflect-metadata@^0.1.13 pg@^8.7.3
2
3npm install -save-dev @types/express@^4.17.13 @types/node@^17.0.42 ts-node-dev@^2.0.0
4

In order to establish a connection to our PostgreSQL database, we need to create a file in the /src folder called data-source.ts with the following content:

1import "reflect-metadata"
2import { DataSource } from "typeorm"
3
4export const AppDataSource = new DataSource({
5 type: "postgres",
6 host: "localhost",
7 port: 5432,
8 username: *** INSERT YOUR POSTGRESQL USER HERE ***,
9 password: *** INSERT YOUR USER PASSWORD HERE ***,
10 database: "catalog_db",
11 synchronize: true,
12 logging: true,
13 entities: [
14 "src/entity/**/*.ts"
15 ],
16 migrations: [],
17 subscribers: [],
18})
19

Please note that some settings in this file might be different (like host & port) depending on your local environment. Also, you’ll need to set the username and password properties based on your username and password to successfully establish a connection. Make sure to provide these values before moving to the next step. The default name of our database is going to be “catalog_db“.

In order to create the database, open the terminal and run the psql utility from PostgreSQL. Inside, run the following command:

1create database catalog_db;
2

In the same /src folder, create the following files:

index.ts:

1import { AppDataSource } from "./data-source"
2import App from './App'
3
4// This is going to be our default local port for our backend. Feel free to change it.
5const PORT = 8090
6
7// Initializes the Datasource for TypeORM
8AppDataSource.initialize().then(async () => {
9 // Express setup
10 const app = App()
11 app.listen(PORT, () => {
12 console.log(`Server running on port ${PORT}`)
13 })
14}).catch((err) => {
15 console.error(err.stack)
16})
17

And App.ts:

1import express from 'express'
2
3/**
4* This is our main entry point of our Express server.
5* All the routes in our API are going to be here.
6**/
7const App = () => {
8 const app = express()
9 app.use(express.json())
10
11 app.get('/api/v1/hello', async (req, res, next) => {
12 res.send('success')
13 })
14 return app
15}
16
17export default App
18

Let’s update our package.json to include the following start script in the “scripts” section:

1 "scripts": {
2 "start": "ts-node-dev --transpile-only src/index.ts",
3 "test": "echo \"Error: no test specified\" && exit 1"
4 },
5

We can check to see if things are working as expected by running our newly created start script.

1npm run start
2

You should see a message saying “Server running on port 8090”. You should also see SQL output in the terminal displayed as we set the logging property in the data-source.ts to be true. This is TypeORM showing what’s happening under the hood! 

At this point, our project structure should look like this:

Screenshot of full-stack demo app project structure

Let’s also ping our API to ensure it is working as expected. Run the following command in a new terminal window while the server is running:

1curl --location --request GET 'localhost:8090/api/v1/hello'
2

If you have received a “success” message, congratulations! Our initial setup is now completed!

Next Step: Data Modeling Process

Now let’s take a look at the data model of our sample app. Since we don’t have a database structure we’re going to build a new one. We could start the schema design in PostgreSQL with SQL, but we’re going use TypeORM to make this process easier instead.

The advantage of using an ORM is that we can define our entities in an Object-Oriented (OOP) fashion and let the ORM tool take care of the relational aspect of our database schema. Our project already has this capability through the synchronize property in the data-source.ts file.

Note: for a production-ready application, we should be changing the synchronize property in the data-source.ts file to false and use the concept of DB migrations instead which is supported by TypeORM out of the box.

Mapping Entities & Relationships With TypeORM

We’ll start the schema design with the core construct of our app: the Product entity.

First, let’s create a new folder in our project directory called /src/entity, where we’ll define all the entities. Inside that folder, create a file called Product.ts and add the following:

1import { Entity, Column, PrimaryGeneratedColumn } from 'typeorm'
2
3@Entity()
4export class Product {
5 @PrimaryGeneratedColumn()
6 id: number
7
8 @Column()
9 sku: string
10
11 @Column()
12 description: string
13
14}
15

Here, we’re describing the properties of our Product entity and this will be translated into a database table by TypeORM.

If the app isn’t running, start it again by running npm run start, and you should see this section somewhere in the output:

1CREATE TABLE "product" ("id" SERIAL NOT NULL, "sku" character varying NOT NULL, "description" character varying NOT NULL, CONSTRAINT "PK_bebc9158e480b949565b4dc7a82" PRIMARY KEY ("id"))
2

Now, if you were to take a look at the catalog_db database using a GUI app like pgAdmin, you’d see our newly created table in there!

Let’s update the Product.ts file.

1import { Entity, Column, PrimaryGeneratedColumn, ManyToOne } from 'typeorm'
2import { Category } from './Category'
3import { Subcategory } from './Subcategory'
4import { Uom } from './Uom'
5
6@Entity()
7export class Product {
8 @PrimaryGeneratedColumn()
9 id: number
10
11 @Column()
12 sku: string
13
14 @Column()
15 description: string
16
17 // Product has one Category
18 @ManyToOne(() => Category, category => category.products, { nullable: false })
19 category: Category
20
21 // Product can have one Subcategory
22 @ManyToOne(() => Subcategory, subcategory => subcategory.products, { nullable: true })
23 subcategory: Subcategory
24
25 // Product has one UOM
26 @ManyToOne(() => Uom, uom => uom.products, { nullable: false })
27 uom: Uom
28}
29

We have added references to a bunch of new entities in this file. You’ll see errors come up since these entities are not yet created.

It’s important to note how the relationship between entities is defined through the JS decorators (ex: @ManyToOne, @OneToMany) – you can find more information about that here.

Now we need to define the other entities that are currently missing. Remember that all these files should be created in the /src/entity directory:

Category.ts

1import { Entity, Column, PrimaryGeneratedColumn, OneToMany } from 'typeorm'
2import { Product } from './Product'
3import { Subcategory } from './Subcategory'
4
5@Entity()
6export class Category {
7 @PrimaryGeneratedColumn()
8 id: number
9
10 @Column()
11 description: string
12
13 // Category has many products
14 @OneToMany(() => Product, product => product.category)
15 products: Product[];
16
17 // Category has many subcategories
18 @OneToMany(() => Subcategory, subcategory => subcategory.category)
19 subcategories: Subcategory[];
20
21}
22

Subcategory.ts

1import { Entity, Column, PrimaryGeneratedColumn, OneToMany, ManyToOne } from 'typeorm'
2import { Product } from './Product'
3import { Category } from './Category'
4
5@Entity()
6export class Subcategory {
7 @PrimaryGeneratedColumn()
8 id: number
9
10 @Column()
11 description: string
12
13 // Subcategory has many products
14 @OneToMany(() => Product, product => product.subcategory)
15 products: Product[];
16
17 // Subcategory has one Category
18 @ManyToOne(() => Category, category => category.products, { nullable: false })
19 category: Category
20
21}
22

Supplier.ts

1import { Entity, Column, PrimaryGeneratedColumn } from 'typeorm'
2
3@Entity()
4export class Supplier {
5 @PrimaryGeneratedColumn()
6 id: number
7
8 @Column()
9 name: string
10
11 @Column()
12 address: string
13
14}
15

Uom.ts

1import { Entity, Column, PrimaryGeneratedColumn, OneToMany } from 'typeorm'
2import { Product } from './Product'
3
4@Entity()
5export class Uom {
6 @PrimaryGeneratedColumn()
7 id: number
8
9 @Column()
10 name: string
11
12 @Column()
13 abbrev: string
14
15 // Uom has many products
16 @OneToMany(() => Product, product => product.uom)
17 products: Product[];
18
19}
20

Warehouse.ts

1import { Entity, Column, PrimaryGeneratedColumn } from 'typeorm'
2
3@Entity()
4export class Warehouse {
5 @PrimaryGeneratedColumn()
6 id: number
7
8 @Column({ nullable: false })
9 name: string
10
11}
12

And here’s what our project structure should look like right now:

Screenshot of full-stack demo app project structure

We’re going to add more entities as we implement new features. Let’s wire up some tests now!

Testing Data Creation and Storage

Let’s test if we can create and store data related to these entities in our database using the ORM capabilities. First, let’s start adding an endpoint for those tests in App.ts:

1 app.post('/api/v1/test/data', async (req, res, next) => {
2    /** @TODO logic to be added */
3    res.send('data seeding completed!')
4  })
5

Next, we need to implement the testing logic inside the testing endpoint using TypeORM to populate the database with seed data. The code should look like this:

App.ts

1import express from 'express'
2import { AppDataSource } from './data-source'
3import { Product } from './entity/Product'
4import { Category } from './entity/Category'
5import { Subcategory } from './entity/Subcategory'
6import { Supplier } from './entity/Supplier'
7import { Uom } from './entity/Uom'
8import { Warehouse } from './entity/Warehouse'
9
10/**
11 * This is our main entry point of our Express server.
12 * All the routes in our API are going to be here.
13 **/
14const App = () => {
15 const app = express()
16 app.use(express.json())
17
18 app.get('/api/v1/hello', async (req, res, next) => {
19 res.send('success')
20 })
21
22 app.post('/api/v1/test/data', async (req, res, next) => {
23 // UOM
24 const each = new Uom()
25 each.name = 'Each'
26 each.abbrev = 'EA'
27 await AppDataSource.manager.save(each)
28
29 // Category
30 const clothing = new Category()
31 clothing.description = 'Clothing'
32 await AppDataSource.manager.save(clothing)
33
34 // Subcategories
35 const tShirts = new Subcategory()
36 tShirts.category = clothing
37 tShirts.description = 'T-Shirts'
38
39 const coat = new Subcategory()
40 coat.category = clothing
41 coat.description = 'Coat'
42 await AppDataSource.manager.save([tShirts, coat])
43
44 // Supplier
45 const damageInc = new Supplier()
46 damageInc.name = 'Damage Inc.'
47 damageInc.address = '221B Baker St'
48 await AppDataSource.manager.save(damageInc)
49
50 // Warehouse
51 const dc = new Warehouse()
52 dc.name = 'DC'
53 await AppDataSource.manager.save(dc)
54
55 // Product
56 const p1 = new Product()
57 p1.category = clothing
58 p1.description = 'Daily Black T-Shirt'
59 p1.sku = 'ABC123'
60 p1.subcategory = tShirts
61 p1.uom = each
62
63 const p2 = new Product()
64 p2.category = clothing
65 p2.description = 'Beautiful Coat'
66 p2.sku = 'ZYX987'
67 p2.subcategory = coat
68 p2.uom = each
69
70 // Note: this product intentionally does not have a subcategory
71 // (it's configured to be nullable: true).
72 const p3 = new Product()
73 p3.category = clothing
74 p3.description = 'White Glove'
75 p3.sku = 'WG1234'
76 p3.uom = each
77 await AppDataSource.manager.save([p1, p2, p3])
78
79 res.send('data seeding completed!')
80 })
81
82 return app
83}
84
85export default App
86

Start the server by running npm run start if it’s not already running. Open a new terminal to test our recently created testing endpoint by running the command below:

1curl --location --request POST 'localhost:8090/api/v1/test/data'
2

You should see a “data seeding complete!” message after executing this command. Inspect the database to see the data that was created by calling this test endpoint.

Wrap-up of Full-stack Project – Part 1

We’ve now gone through the setup steps and discussed the core entities that are going to be a part of this sample application. The groundwork for our data model and back-end structure is complete. 

Check out part two of this series, where we explore some of the key features of GraphQL and start wiring our back-end API! 

Originally published on Jul 13, 2022Last updated on Mar 28, 2023

Looking to hire?

Join our newsletter

Join thousands of subscribers already getting our original articles about software design and development. You will not receive any spam, just great content once a month.


Read Next

Browse Our Blog